Foam rolling for posture is one of those ideas that sounds right and usually gets done wrong. Someone buys a roller, lies on their back, grinds up and down the spine for ten minutes, stands up feeling loose, then sits in the same collapsed position for the next six hours. Nothing changed, because nothing about a roller makes you stand differently.
Here is what rolling actually does, and I say this as a physical therapist who has spent twelve years telling people to roll less than they think they should: it changes what your nervous system is willing to allow. For a short window after you roll, the tissue tolerates a bit more length, the muscles quiet down, and blood moves through the area. That window is the opportunity. What you do in the ten minutes after you roll is what decides whether your posture changes at all.
This guide is the routine I hand out in the clinic. It takes about eight minutes, it uses one soft roller and one posture brace as a training cue, and it targets the upper back, lats, shoulders, and hips rather than the parts of your spine you should never roll.
Why you should trust me
I have been a physical therapist for twelve years, and roughly half of that was spent in a clinic where people came in with backs that "just hurt" and legs that "would not loosen up." I prescribe rolling the way a physician prescribes medication: a specific area, a specific dose, a specific reason, and a stop rule if it makes things worse. I keep a pressure gauge in my treatment room for the "it hurts so it is working" crowd, mostly to show them that the pressure they are chasing is doing nothing except tensing the muscle they are trying to relax.
I own rollers ranging from cheap pool-noodle density up to the firmest cylinders on the market, plus a massage gun collection that takes up half a closet. That history is why I am picky about what I recommend and why I will tell you when a piece of gear is the wrong tool.
How I picked and how I tested
The two items below are not a shopping list of everything you could buy. They are the two pieces this specific routine needs: a roller soft enough to work on the rib cage and upper back without bracing against it, and a brace used as short-term feedback while you practice the positions you want to keep.
When I evaluate a roller for posture work, I look at three things. First, does the density match the target? A soft roller on a rib cage is correct. A soft roller on a thick quad is a polite fiction, and I will say so below. Second, does it survive six months of real use, or does it flatten into an oval after a season? Third, can a normal person use it without hurting themselves on the first attempt?
For a brace, the criteria are narrower. It has to be adjustable enough to sit on the shoulder blades rather than in the armpits, it has to be comfortable enough that you will wear it for twenty minutes while moving, and it has to be something you graduate out of rather than lean on. A brace that feels good while you sit still is teaching you nothing. A brace worn during active drills is teaching your body where "shoulders back" actually is.
The two pieces of gear this routine uses
Everything in the routine works with a floor, a wall, and these two items. Nothing else is required.
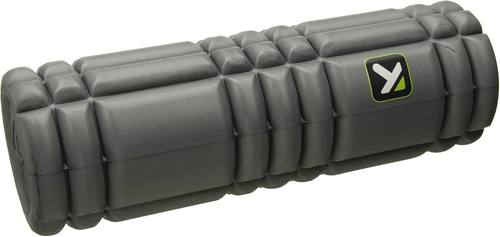
The soft-compression pick: TriggerPoint CORE Foam Massage Roller with Softer Compression for Exercise, Deep Tissue and Muscle Recovery - Relieves Muscle Pain & Tightness, Improves Mobility & Circulation (12'', 18'', 36'')
 Visit on Amazon →
TriggerPoint builds this CORE model around softer compression than their firmer rollers, and for the upper back work in this routine that is the correct choice, not a compromise. When you are lying over a roller to open the thoracic spine, a dense cylinder makes you guard, and a guarded upper back does not extend. The softer surface lets you sink in and breathe, which is the entire point of the first two steps below. It comes in three lengths: a short one for travel, and the long one if you want to cover both sides of your upper back at once instead of shifting side to side.
The honest limitation is on big muscle groups. If your goal is deep, stubborn quad or IT band work, this is not the roller for that job, and no amount of pressing harder will turn a soft roller into a firm one. Use it for the thoracic spine, the lats, the front of the shoulders, and the glutes, which is exactly what posture work needs.
Flaws but not dealbreakers: Softer compression means less sensation, and some people read less sensation as "not working." It is working. Pressure you can breathe through is the dose that changes tissue tolerance.
Anyone whose upper back feels locked after a day at a desk will get more out of this than out of a rock-hard cylinder they avoid using.
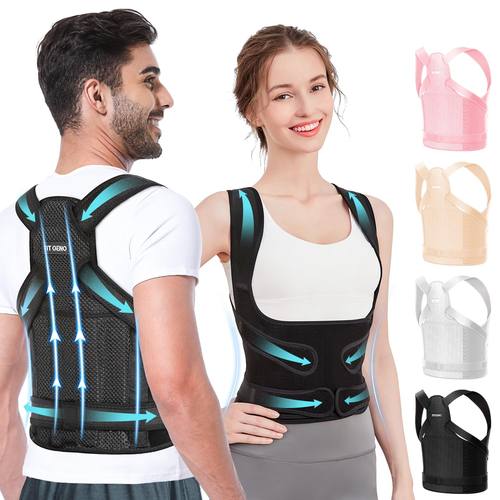
The posture cue: Fit Geno Posture Corrector for Women & Men, Back Shoulder Support Brace
 Visit on Amazon →
A brace is a reference point, not a fix. The Fit Geno corrector is designed to sit across the upper back and draw the shoulders into a supported position, and that is useful for one specific job in this routine: giving you a physical reminder of where your shoulders belong while you practice the drills that actually build the tolerance to hold them there. Wear it for twenty to thirty minutes during the wall slides and chin tucks below, not for a full workday, and never overnight.
Two rules I give every patient. If your fingers tingle or your hands go numb, it is too tight, take it off. And if you cannot do the drills without it after two or three weeks, you have built a dependency instead of a habit. Sizing matters more than people expect, so check the size chart rather than guessing.
Flaws but not dealbreakers: Any brace is a passive cue, and passive cues do not strengthen anything by themselves. The brace is the training wheel. The drills are the bike.
Anyone starting a posture routine who cannot feel what "shoulders back" means yet will get the most from this in the first two weeks.
The actual posture routine
This is the sequence. Do it in order, because the rolling opens the window and the drills use it. Total time is about eight minutes.
Step one: Set the dose before you touch the roller. Thirty to ninety seconds per area. Pressure around a five out of ten, meaning uncomfortable but your breathing stays easy and your face is not doing anything strange. Move about an inch per second. If you are holding your breath, you are pressing too hard, and the muscle you are chasing is tightening in response. Pain during rolling is a signal to back off, not a badge of honor.
Step two: Upper back, thoracic extension. Lie on your back with the roller across your upper back, perpendicular to your spine, somewhere between the bottom of your shoulder blades and the base of your neck. Support your head with your hands. Let your upper back drape over the roller and breathe out slowly, letting the ribs open. Do not roll your lower back. The lumbar spine has no rib cage to protect it, and loading it directly makes the muscles around it guard harder, which is the opposite of what you want. Work in small passes across the upper back only.
Step three: Lats. Lie on your side with the roller under your armpit, arm extended overhead, and take slow passes from the armpit down toward the bottom of the rib cage. The lats are a common reason shoulders round forward, and they respond well to this position. Sixty seconds per side is plenty.
Step four: Front of the shoulder and chest. Stand facing a wall with the roller pinned between the wall and the front of your shoulder, just inside the shoulder joint. Lean in and move your arm across your body in slow arcs. This is the tissue that pulls your shoulders forward all day, and it is almost never rolled because people only think about their backs.
Step five: Glutes and hips. Sit on the roller with one ankle crossed over the opposite knee, lean your weight toward the crossed side, and make slow passes. Posture is not only an upper body story. If your hips cannot tolerate extension, your rib cage will compensate, and your shoulders will pay for it.
Step six: Put the brace on and do the drills. Now the window is open. With the Fit Geno corrector on, do three movements: wall slides, where your forearms stay in contact with the wall as you raise and lower your arms; chin tucks, where you glide your head straight back without tilting; and a doorway chest stretch, thirty seconds per side. Ten to fifteen slow repetitions of each. Keep the brace on for twenty to thirty minutes total, and take it off when you are done. Do not wear it while sitting still at a desk, because sitting still is not practice.
Step seven: Frequency and progression. Five or six days a week for the first two weeks, short sessions only. Consistency beats duration here, and a five-minute daily routine outperforms a forty-minute Sunday session every time. After two weeks, keep the rolling and the drills and start dropping the brace to every other session. The goal is to need it less each week, not to wear it more.
Step eight: Know when to stop. Do not roll your neck, ever, and do not roll directly over bones, the spine itself, or the front of the knee. Stop immediately if you feel tingling, numbness, or pain that shoots away from the area you are working, and stop if soreness lasts more than a day. Rolling should feel like pressure you can breathe through, and it should leave you feeling better within an hour. If it does not, that is information, and it is worth seeing a professional rather than rolling harder.
One more scheduling note: rolling before a workout and rolling after a workout are not the same job. Before, keep it short, thirty to sixty seconds per area, to prep and wake things up. After, slow down and give each area sixty to ninety seconds for recovery. They are not interchangeable.
The competition and why it lost
The RumbleRoller is a genuinely great tool for stubborn quads and IT bands, and it is also a torture device with a handle. It is not a beginner roller and it is not what this routine needs, because textured pressure on a rib cage makes people tense up instead of open up.
The OPTP Pro-Roller is the firm roller I recommend to athletes. The density is honest and it does not flatten after a year of use. If your goal is deep work on big muscle groups, that is where your money should go, and it is a different purchase from a soft roller for thoracic work. You can absolutely own both, and many of my patients do.
LuxFit's high-density cylinder is the best budget pick in the category. It is a straight cylinder that does the job without gimmicks, and it is a fine second roller for legs.
Vibrating rollers are a luxury, not a necessity. The vibration helps, and a good firm roller still gets you most of the way there for a fraction of the cost. Skip anything marketed as "infused," and skip inflatable rollers entirely, because a roller that pops mid-session is worse than no roller.
Massage guns belong in a different conversation. They are for muscles, never for bones, joints, or your neck. I have seen the injuries, and they are avoidable.
What this all costs
There are two purchases here, and neither one is a subscription. That matters, because the value math on recovery gear is about use, not about the sticker.
Take the routine above at five sessions a week. That is roughly 260 sessions a year. Whatever you pay for the roller and the brace, divide it by 260 and that is your per-session cost for the next twelve months, assuming you actually use them. Most people quit rolling within a month, which is why I care more about whether the gear fits your routine than whether it is the most advanced option on the market. A roller that lives in the closet is a paperweight with a warranty.
The brace is the piece with a shelf life in your routine. It is there to teach a position, and once you can find that position without it, it goes in a drawer. That is the correct outcome.
Check current Amazon price for both items before you decide, and check them again when you are ready to buy, because the numbers move.
The equipment is the easy part. Eight minutes, five days a week, in the right order, with pressure you can breathe through. That is the whole protocol, and it is the version I would hand to my own patients. Start tonight, keep it short, and let the brace teach you what your shoulders are supposed to feel like.