Posture correction at home fails for the same reason most home exercise fails: the gear arrives and the routine does not. Someone buys a brace, wears it for a week, feels better, takes it off, and cannot work out why the slump comes back. Someone else buys a positioning tower, uses it twice, and lets it become the most expensive clothes rack in the basement.
I have spent twelve years as a physical therapist, most of it in a clinic where the referral line was basically "back hurts, please fix." The patients whose posture actually changed were not the ones with the fanciest equipment. They were the ones who understood what each tool was for, how long to use it, and when to put it down.
So this is the how-to version of that conversation. It covers a daily posture correction routine you can run in about twelve minutes, the two pieces of equipment that carry the most weight when the goal is posture and recovery, and the habits that turn good gear into a paperweight.
Why you should trust me
Twelve years of hands-on practice, and one specific bias: I prescribe movement the way a doctor prescribes medicine, which means a target, a dose, and a reason. I keep a pressure gauge in my treatment room for the "it hurts so it is working" crowd, because pain during a stretch or a roll is a signal to back off, not a badge of honor.
I do not tell people that rolling breaks up scar tissue, because it does not. What rolling and positioning work actually do is improve blood flow, calm a nervous system that is guarding, and give you a window where movement feels easier. That window is where strength work happens, and strength work is what holds posture.
I also have opinions about rollers that flatten after three months, inflatable devices that pop mid-session, and "deep tissue" printed on a soft cylinder. If a tool cannot survive six months of normal use, it does not belong in a plan.
How I picked what belongs in a posture routine
A posture routine has two jobs. It has to create space, and it has to build capacity. Anything that only does the first job becomes a crutch.
So I judge equipment on four questions:
- Does the tool serve a target you can name out loud? "My upper back" is a target. "My whole body" is a shopping problem.
- Can a normal person use it without hurting themselves on day one?
- Does it hold up over six months of real use?
- Would I hand it to a patient and expect them to actually use it at home?
Two products passed those questions for this article. One supports the spine while you rebuild tolerance. The other positions the spine so extension work is possible without guessing.
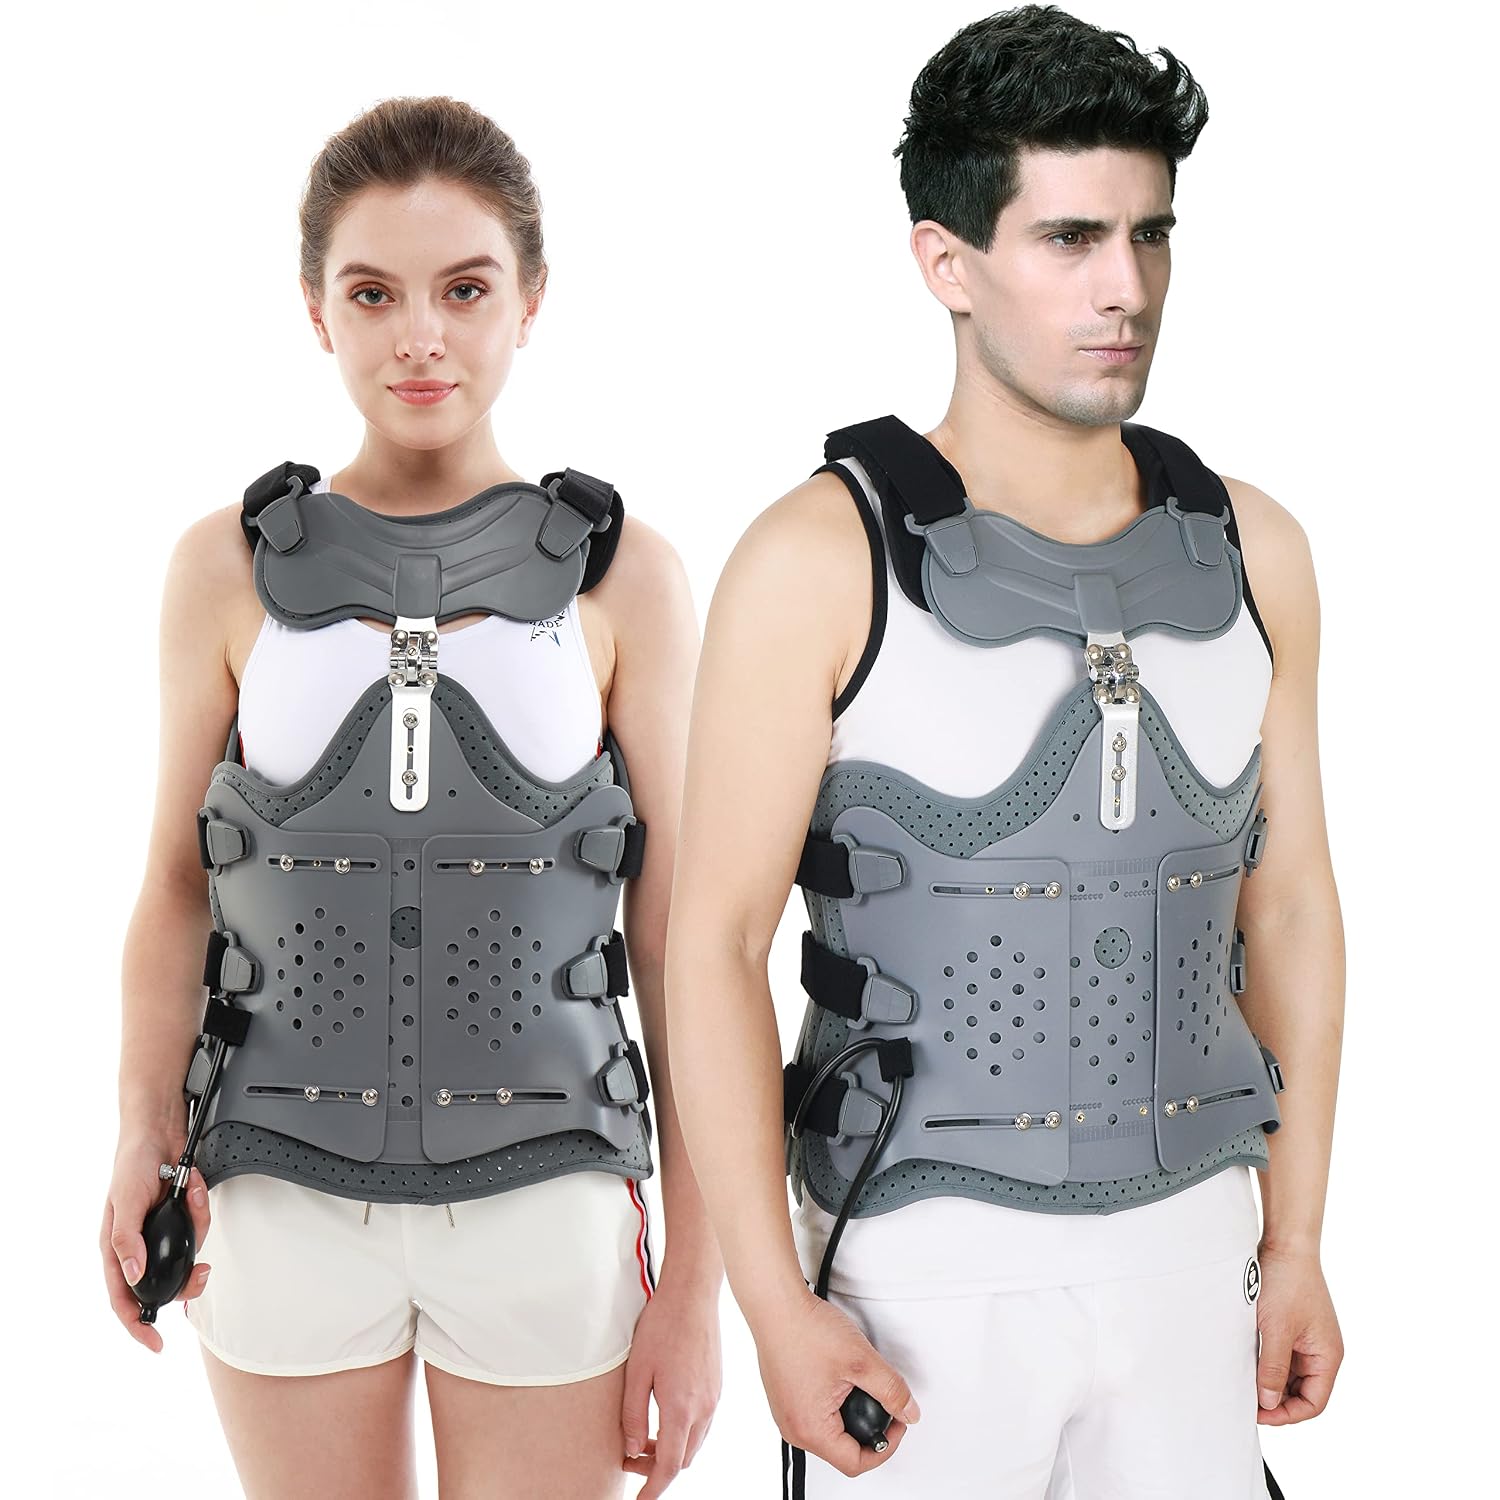
Support pick: TLSO Thoracolumbar Fixed Spinal Brace,Lightweight & Adjustable Inflatable Back Brace for ScoliosisOsteoporosis,Kyphosis,Mild Scoliosis,Posture Correction, Post-Surgery Recovery
 Visit on Amazon →
This is a thoracolumbar support with an inflatable bladder, which means you control how much pressure sits against your back instead of accepting whatever a fixed shell gives you. The listing covers scoliosis, osteoporosis, kyphosis, post-surgery recovery, and general posture correction, and that range matters: this is a support device, not a training device.
How I would use it: as a tool for the hours when posture collapses, not as the thing that fixes posture. If your mid-back gives out during a long drive, a desk block, or a recovery week after surgery, a brace buys you tolerable time. What it does not do is make the muscles that hold you upright any stronger. Wear it for the tasks that flare you, take it off for the work that builds you, and follow whatever schedule your clinician gave you, because the fit and the wear time are the whole game with a brace like this.
Caveats worth saying out loud: an inflatable brace that is over-tightened will change how you breathe, and a brace worn all day every day can let your own support muscles get lazy. Start with less inflation than you think you need. If it rides up into your ribs or digs into your hips when you sit, the size or the placement is wrong, and no amount of adjusting the bladder will fix that.
Anyone in a post-surgical window, managing a diagnosed curve, or dealing with a mid-back that fatigues before the workday ends should look here. If your back pain is sharp, new, or travels down a leg, that is a clinician conversation first, not a purchase.
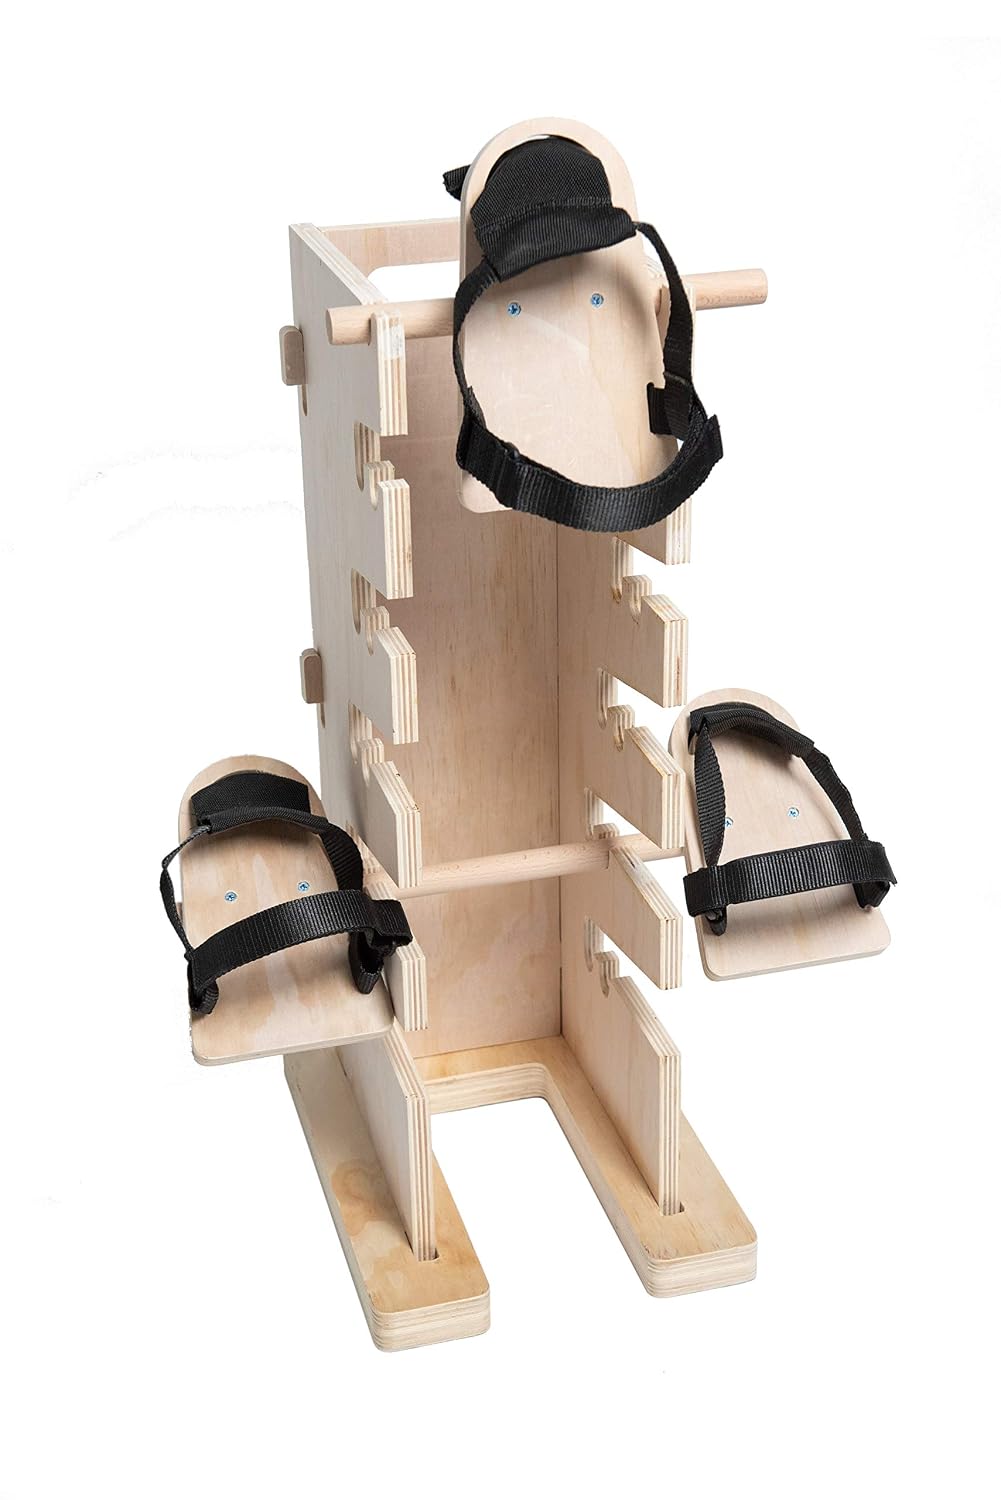
Positioning pick: Pain Free at SEA Posture Therapy Multi-Positioning Tower (Includes Single and Double Pedal)
 Visit on Amazon →
This is the piece of gear that makes extension work possible at home without a second person. It is a multi-positioning tower with both a single and a double pedal, so you can set your body against it and let the frame hold the position while you breathe and let the front of your body open. That is the opposite of forcing a stretch, which is exactly the point.
Where it earns its place: thoracic extension, hip flexor and chest opening, and supported positioning for people who cannot get the same result lying over a foam roller on the floor. The pedals give you a place to push and stabilize, which makes the position feel less like a trust fall.
Caveats, and these are firm. Do not use a tower like this during an acute flare, after a fresh injury, or if you have an unstable spine, a disc issue that has not been cleared, or pain that shoots down an arm or a leg. Extension work is powerful and it is not neutral. Start with the smallest range you can tolerate, hold for 30 to 60 seconds, breathe out slowly, and come off before a stretch turns into a strain. If you have never done extension positioning, get one session with a PT who can watch your ribs and pelvis, then take it home.
Anyone with a desk job, a stiff thoracic spine, and clearance to move should get real value here.
The routine itself
Twelve minutes, five steps, done most days. This is the dose I would give a patient with no red flags and a desk job.
Step one: name the target. Pick one thing. Upper back rounding, forward head, or the pelvis tucking under when you sit. One target, for two weeks. Posture correction fails when you try to fix five things at once and cannot tell what is working.
Step two: open the tissue, two minutes. Roll the thoracic spine and the lats, or use the tower for a supported extension hold. Pressure should feel like a firm thumb, not a truck. Breathe the whole time. If you hold your breath, you are bracing against the work instead of letting it happen.
Step three: position or support, four to six minutes. This is where the brace and the tower live. Brace on if you are doing a task that reliably pulls you into a slump, such as a long drive or a heavy work block. Tower if you are doing extension and opening work. Keep this block short. It is preparation, not training.
Step four: build capacity, four minutes. Two or three exercises that make the new position hold itself. A row variation, a chin tuck against light resistance, a dead bug, a split squat if your hips are the problem. Slow tempo, full range, no rushing. This is the part that changes posture six months from now.
Step five: log it and stop. Write down the target, the time, and how it felt on a scale of one to ten. Stop while you still feel good. Recovery is training, not a break, and it is also not a punishment.
How long until anything changes
Two weeks to feel a difference in how you sit. Six to eight weeks for other people to notice. That timeline assumes most days, not perfect days. Five days a week for eight weeks beats seven days a week for one week and then nothing.
When to stop and call someone
Stop the routine and get assessed if you get numbness, tingling, weakness, night pain, or pain that gets worse as the session goes on rather than better. Posture work should feel like effort, not like damage.
What to do when progress stalls
Nine times out of ten, a stalled posture routine is a dose problem, not a gear problem. The usual suspects:
- The positioning block got long and the strength block got skipped. Support without strength is a circle.
- The target changed every week. You cannot measure progress against a moving goal.
- The brace became a lifestyle. Wearing support all day teaches your body that it does not have to hold itself up.
- The tower got used once, hard, and then avoided. Small range held long beats deep range held once.
If none of that applies and you are still stuck, the problem is usually above or below the spot that hurts. A thoracic spine that will not extend because the hips will not move is not a mid-back problem. That is a session with a clinician, not another purchase.
Gear that is not in this article
Massage guns are for muscles, not for bones, joints, or your neck, and they are not a posture tool. A vibrating roller is a luxury, not a necessity: the vibration helps, and a good firm roller gets you most of the way there. Textured rollers that look like they came out of a pool toy aisle are a no. And nothing inflatable should be used as a strength tool, because it is not one.
The brace and the tower are here because each one answers a specific question in a posture plan: how do I get through the hours my posture collapses, and how do I open a stiff thoracic spine without a partner. Different jobs, different tools.
What this all costs
The routine is free. The gear is optional, and both links above show current pricing, so check them rather than trusting a number someone typed six months ago. A brace is the lower-commitment purchase of the two and the one you are more likely to use daily. A positioning tower is the bigger commitment and the one that pays off only if you actually get on it three or four times a week.
The honest math is not the sticker price. It is cost per use. A tool you use four times a week for a year is cheap. A tool you use twice and lean in the corner is expensive no matter what you paid for it. Buy the one that fits the routine you will actually run, not the routine you wish you had.
That is the whole job: name the target, open the tissue, support or position, build capacity, log it, stop. Your spine does not need more gear. It needs a dose.